There is so much conflicting information about how best to clean your windows. From the types of chemicals you should use, to the best material for your cleaning cloth and even the tips and tricks on avoiding leaving smears after you have finished cleaning.
Because of all this misinformation, it can often be challenging to work out exactly how to get your windows completely clean and free from smears. So, we have put together this comprehensive guide to bust those cleaning myths and inform you of the easiest, most efficient and most effective methods of cleaning your windows – both inside and out.
The three most common mistakes when cleaning windows
If you finish cleaning your windows and they are covered in smears and marks, your first reaction might be to think you are missing some vital tool, a better cleaning product, or an alternative technique. The result is that people often keep adding more steps to the cleaning process.
The actual cause is most likely the opposite of what you would think; people typically add too much to the cleaning process. As Daniel Heayberd (Operations Director for Mustang Cleaning Supplies) describes, the three most common mistakes when cleaning windows are as follows:
- Using too much of any cleaning chemical – This is the number one mistake that people tend to make. You only need a tiny amount of cleaning chemical, seeing as its only purpose is to lift stubborn dirt from the surface. When you add too much cleaning chemical to a window, it becomes difficult to remove that chemical entirely. Once the window dries and the water evaporates, you are left with chemical residue on the window, which is often the cause of smears.
- Going over it with hand towels or paper that will leave behind lint – The second biggest mistake that tends to be made and why windows will often look dusty after cleaning. If you use any hand towel or paper on your windows, parts of the material are likely to break off as everything gets damp, and these particles are left behind, on the window, in the form of lint.
- Doing it when it’s sunny – The third most common problem when cleaning windows is doing so whilst the sun is shining. As lovely as it is to clean your windows on a sunny day, this is the worst condition. The sun will cause your windows to try too quickly before you have had a chance to rinse off any chemicals from the windows, resulting in – you guessed it – those dreadful smears being left behind.
The guide to cleaning your windows correctly and effectively
Enough about how not to clean windows. Let’s move on to the correct way to clean windows – from start to finish, including everything you need for inside cleaning, outside cleaning, and even some tips on cleaning those second-floor windows that seem impossible to reach.
Getting the right tools and cleaning supplies for the job at hand
We’ve all heard this one before; if you don’t have the right tools for the job, it’s bound to go wrong. It is no different when it comes to cleaning your windows. It would help if you had the right window cleaning equipment before you start as this will make your cleaning efforts so much more efficient. Don’t worry, though; having the correct equipment doesn’t have to mean lots of expense. It means getting a few key things ready to make your cleaning as simple and effective as possible.
A list of must-have equipment for cleaning your windows
We have compiled a list of the most valuable tools, equipment, and chemicals required for window cleaning. Typically, you will only need these three things to have spotless and smear-free windows. However, if you are cleaning second-floor windows, you may need some additional equipment, which we will cover further in this article.
- Microfibre Cloths or Microglass Cloth
- A large bucket filled with clean water
- Clover Brite or Evans Clear
- Spray Bottle
A note on window cleaning chemicals
There are many different cleaning chemicals, and people often have their personal favourite. We recommend Clover Brite and Evans Clear as being two of the best options, and in fact, they are the most popular with our customers as well.
Regardless of the chemical that you use, it is essential to a) follow any instructions on the back of the container, especially about the recommended water to chemical ratio and b) to not over-apply the chemical to your window.
The job of the cleaning chemical is to break the surface tension of any dirt or grime on the surface, making it easier to remove during the cleaning process. This is the same regardless of what surface you are cleaning. Still, given that windows are not generally caked in dirt, it requires only a minimal amount of chemical or surfactant to break it down and allow it to be wiped off with your microfibre cloth.
Chemical alternatives for cleaning your windows
Not everybody likes to use chemicals when cleaning, and if you fall into that group, don’t worry, as there are plenty of natural alternatives.
One of the most popular alternatives for cleaning your windows is distilled vinegar. This is also known more commonly as white wine vinegar, and many people swear by it for its ability to produce clean, clear and streak-free windows.
Vinegar can be mixed with water at a ratio of 1:10 – 1 part vinegar to 10 parts water. It can then be applied to the window with a damp microfibre cloth and then rinsed off with water.
If you don’t want to use a chemical cleaner, but don’t like the sound of vinegar either, then you have the option of just water alone. As long as your windows are not extremely dirty, a chemical-free, water-only solution can do the job just fine. You are using a new, clean ultra-absorbent cloth such as a glass fibre cloth mentioned earlier in the article.
In reality, the water is just helping to lift any dust or light stains on the windowpane, and the cloth will take care of removing the dirty water from the surface allowing the window to dry clean and streak-free.
If you want to take that process one step further, you can use distilled water that is free from minerals or other deposits that would otherwise leave water-marks or streaks on your windows post-cleaning.
The window cleaning process – step by step
Now that you have all of the equipment you need, you are ready to start the cleaning process. Make sure you follow this guide, getting everything prepared beforehand before carrying out the cleaning process.
Preparation
First of all, fill up your bucket with clean water – the cleaner, the better, so make sure there isn’t any chemical residue, dust or dirt in your bucket before filling it with water. Even if you are only cleaning a small window, you still want to have plenty of water in the bucket. This will be used for rinsing your microfibre cloth and the windows themselves after applying the cleaning chemicals. The more water you have in the bucket, the more thoroughly you can rinse everything off post-clean.
Next, if you have a 5L container of Clover Brite, Evans Clear or your cleaner of choice, be sure to mix the chemical with water, according to the instructions on the back of the container. It is essential to have the correct ratio of cleaning chemicals and water – too little and the chemical will not be effective. Still, equally, if the concentration is too intense, it won’t be easy to wash the chemical off the windowpane.
Ideally, the chemical solution should be decanted into a spray bottle for easy application to your windows before cleaning.
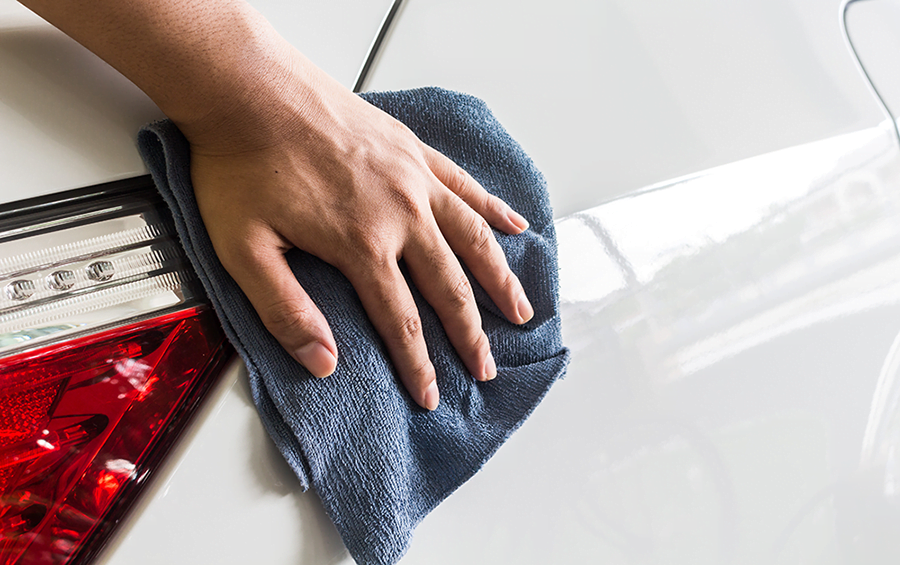
The last thing that you need is your microfibre or micro glass cloth at the ready. These cloths are your secret weapon in the window cleaning battle – a typical microfibre cloth can hold up to 7 times its weight in liquid, making it ideal for lifting dirt, water, and cleaning chemicals from the surface of your windows. As impressive as these micro glass cloths are, they are most effective when well looked after, clean, and dry.
If you don’t have a microfibre cloth, you can use an alternative as long as it is lint-free. One common choice used by many homeowners is newspaper. The reason is that newspaper is made from exceedingly soft fibres (So it won’t scratch your windows). They are also tightly packed together, making it less likely to leave behind any fibres on the windowpane itself.
Cleaning the inside of your windows
Once you have everything ready, its time to start the cleaning process. Let’s start with the inside windows first – this is usually the most logical approach as you will have prepared everything indoors. It is also better to do the outside afterwards; otherwise, you risk bringing in dirty or wet equipment after cleaning the outside windows.
First, spray your chemical solution in the centre of the glass surface using your applicator or spray bottle. Using a damp microfibre cloth, rotate across the surface of the glass, from the centre to the edges. Be sure to cover the entire surface of the window as evenly as possible.
Once you have applied the cleaning chemical, you can rinse the microfibre cloth in the bucket of water rinse it out as much as possible, leaving it slightly damp. With the slightly damp cloth, wipe over the window, removing excess water or cleaning chemicals from the surface.
The great thing about the microfibre or microglass cloth is that they will pick up all the dirt, water, and cleaning chemicals from the window, due to their ultra-absorbent nature. There shouldn’t be any need to dry the window after cleaning thoroughly if done correctly. Instead, you can leave the window to dry naturally, leaving a streak-free finish.
Cleaning the outside of your windows
The next step will be to clean the outside of your windows. This is important because if you only clean one side of your window, any dirt, marks, or smears on the opposite side will show through, making the window look dirty and unsightly.
Cleaning the downstairs windows from the outside should be relatively straightforward and should require a very similar, if not identical, process to that of cleaning the inside of your windows.
It is best to replace the clean cold water in your bucket and the microfibre cloth that you are using – that will allow you to get the best clean and avoid transferring any leftover dirt or dried chemicals from the inside cleaning process. Don’t worry, though; you can reuse your microfibre cloth in future after handwashing it in warm water or machine-washing it with the optional addition of a mild detergent when extremely dirty.
The only thing to consider with outside windows is that they are likely to be a little dirtier than the inside of your windows, as they are more exposed to the elements. In cases where the windows are filthy, you can do an initial wash, leave the window to dry and then go over it again with the same process until they are spotless.
Remember: Avoid cleaning your windows in direct sunlight; otherwise, the solution will evaporate too quickly, leaving streaks on your windows.
How to clean second-floor windows that you can’t reach
This is where things get a little more complicated. You have cleaned your downstairs windows inside and out, now you have realised that the remaining windows on your house look filthy in comparison.
Being on the second floor, these windows are a lot more challenging to get to – sure; you can easily clean the inside of those windows from the upstairs rooms. However, they won’t look clean unless you can somehow get to the outside of those windows.
There are a few options here but beware; all options will require some form of investment.
Option 1: Cleaning from the outside with a Telescopic water fed pole
This option will allow you to get a spotless window, but it does come at a cost. First of all, you will need to purchase a telescopic cleaning pole. These poles come in various forms, including water-fed variations that automatically pump water up to the area being cleaned.
They range in price but will add a considerable amount to your window cleaning efforts. They also have some other drawbacks, including the issue of storing the device and the effort required to use it – so this option is certainly not for the faint-hearted.
If your outside windows are just a little out of reach, then you can also use a mop or a long-handled cleaning brush as an alternative to a telescopic pole. This will provide you with extra reach but will not be anywhere near as expensive, difficult to store or hard to handle.
Option 2: Cleaning from the inside using a magic window cleaning kit
There are various types of magic cleaning kits on the market that will allow you to clean your external, second-floor windows quickly and effectively from the inside without risking your life trying to lean out of the window.
These kits’ work is simple – you dangle one part of the cleaning tool out of the window whilst the other part stays on the inside. These two parts are magnetised so that they will clamp together through the window. During the setup phase, they are typically attached with a cord to stop one part from falling to the ground.
Once the magic cleaning kit is set up, you can move the inside part of the kit over the window’s surface, which will cause the part on the outside of the window to follow the same path. This allows you to clean the outside of your window with minimal effort thoroughly.
If that sounds a little too fancy, there are similar alternatives. For example, you can also get a u-shaped telescopic cleaning pole with adjustable angles that make it possible to feed it out of a window and then manoeuvre it easily, from the inside, to clean off the external surface of the windowpane thoroughly.
Option 3: Hire a professional
Suppose it all gets a little too much, and you don’t feel like you can safely clean the outside of your windows. In that case, you always have the option of hiring a professional window cleaner, and while this may seem like a cop-out at first, when you consider the additional cost of external window cleaning equipment and the effort required to clean the second-floor windows effectively, sometimes hiring a professional can be the more sensible and cost-effective option.
If you still want to get involved and save as much money as possible, it makes sense to focus on cleaning the insides of your windows by yourself and then hiring a window cleaner to take care of just the external windows.
Summing things up
But don’t worry; now that you have read our guide to cleaning windows, you know all of the tips, tricks and trade secrets, making it easier for you to find and select the right window cleaner safe in the knowledge they are doing the best job possible on your windows.
